Preferences
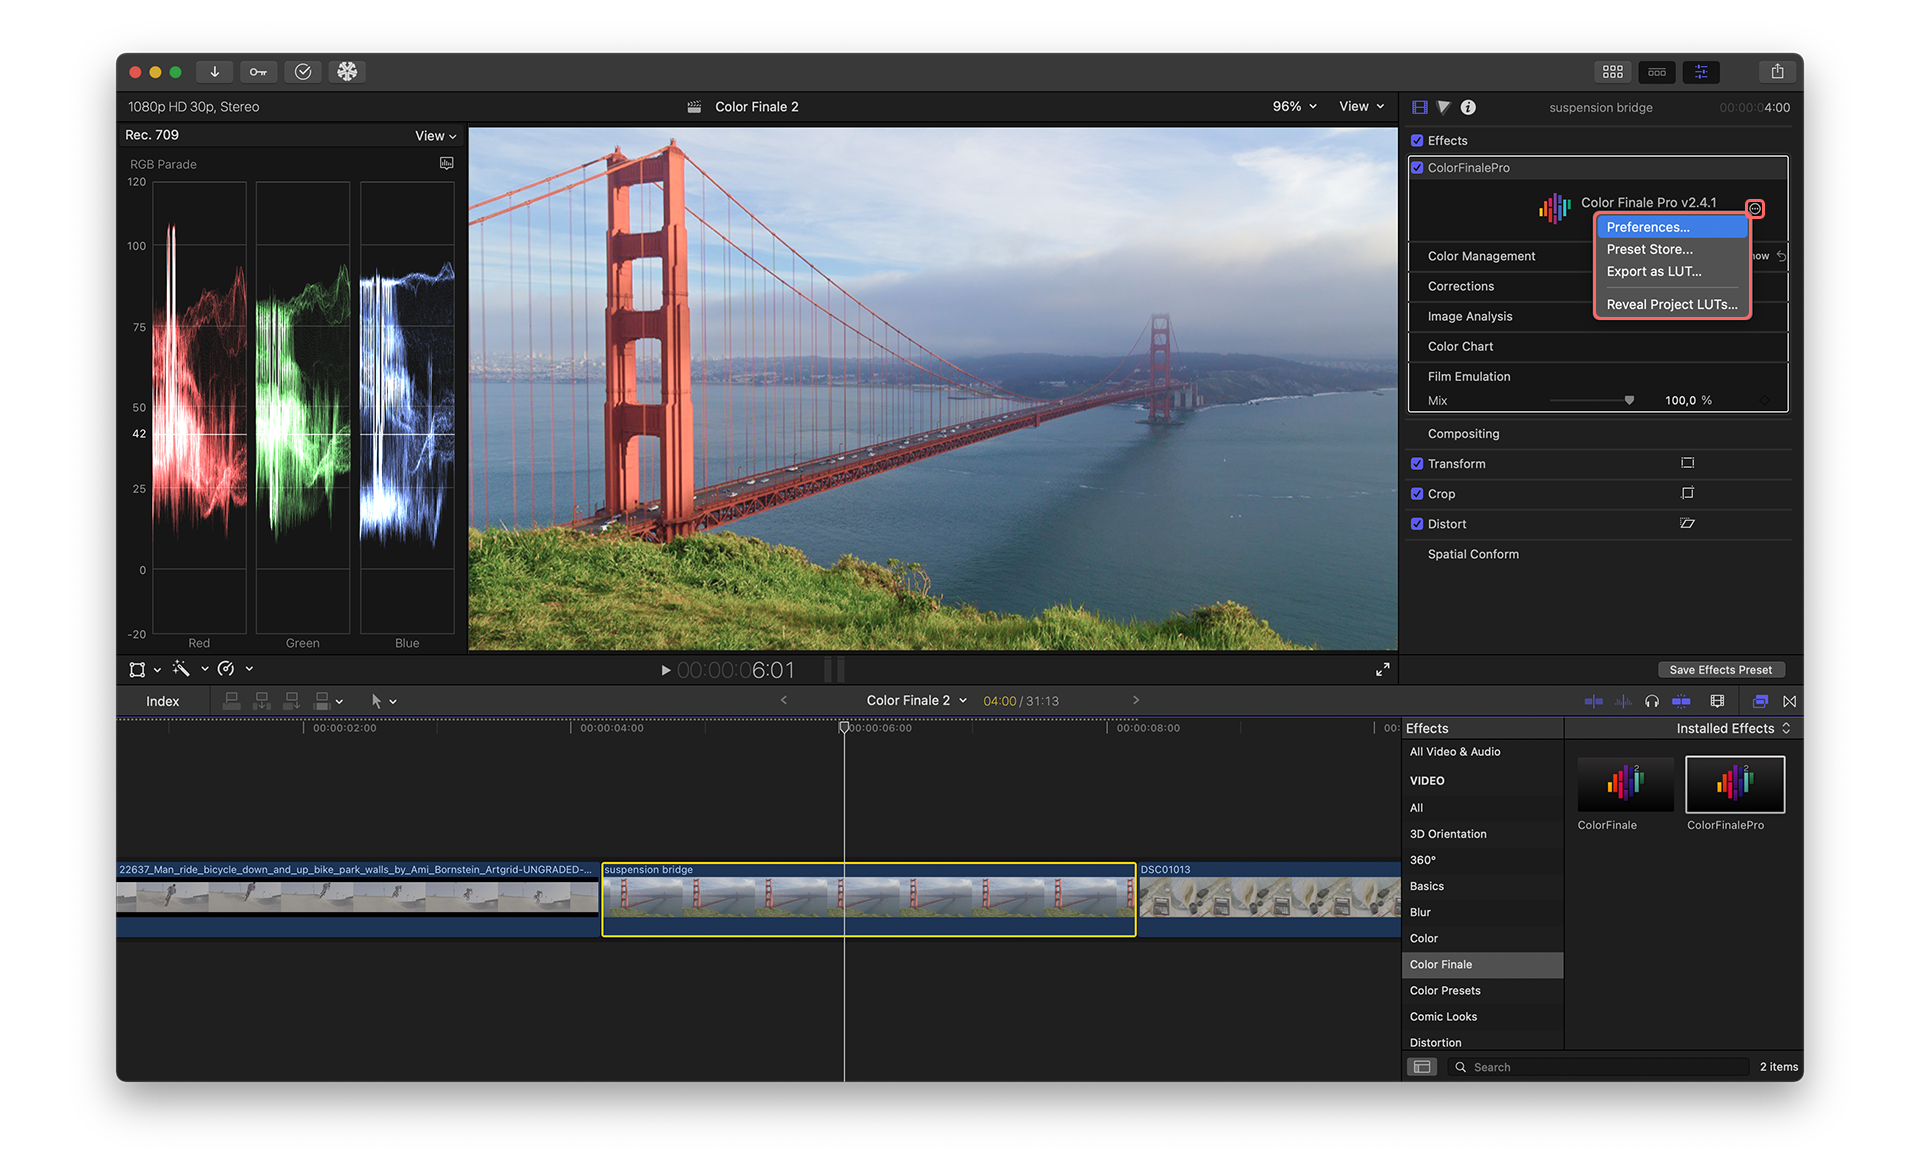
Color Finale 2 Preferences are available from the top Gear icon in the inspector effect panel. It is divided into sections including License, LUTs, Settings, and Feedback.
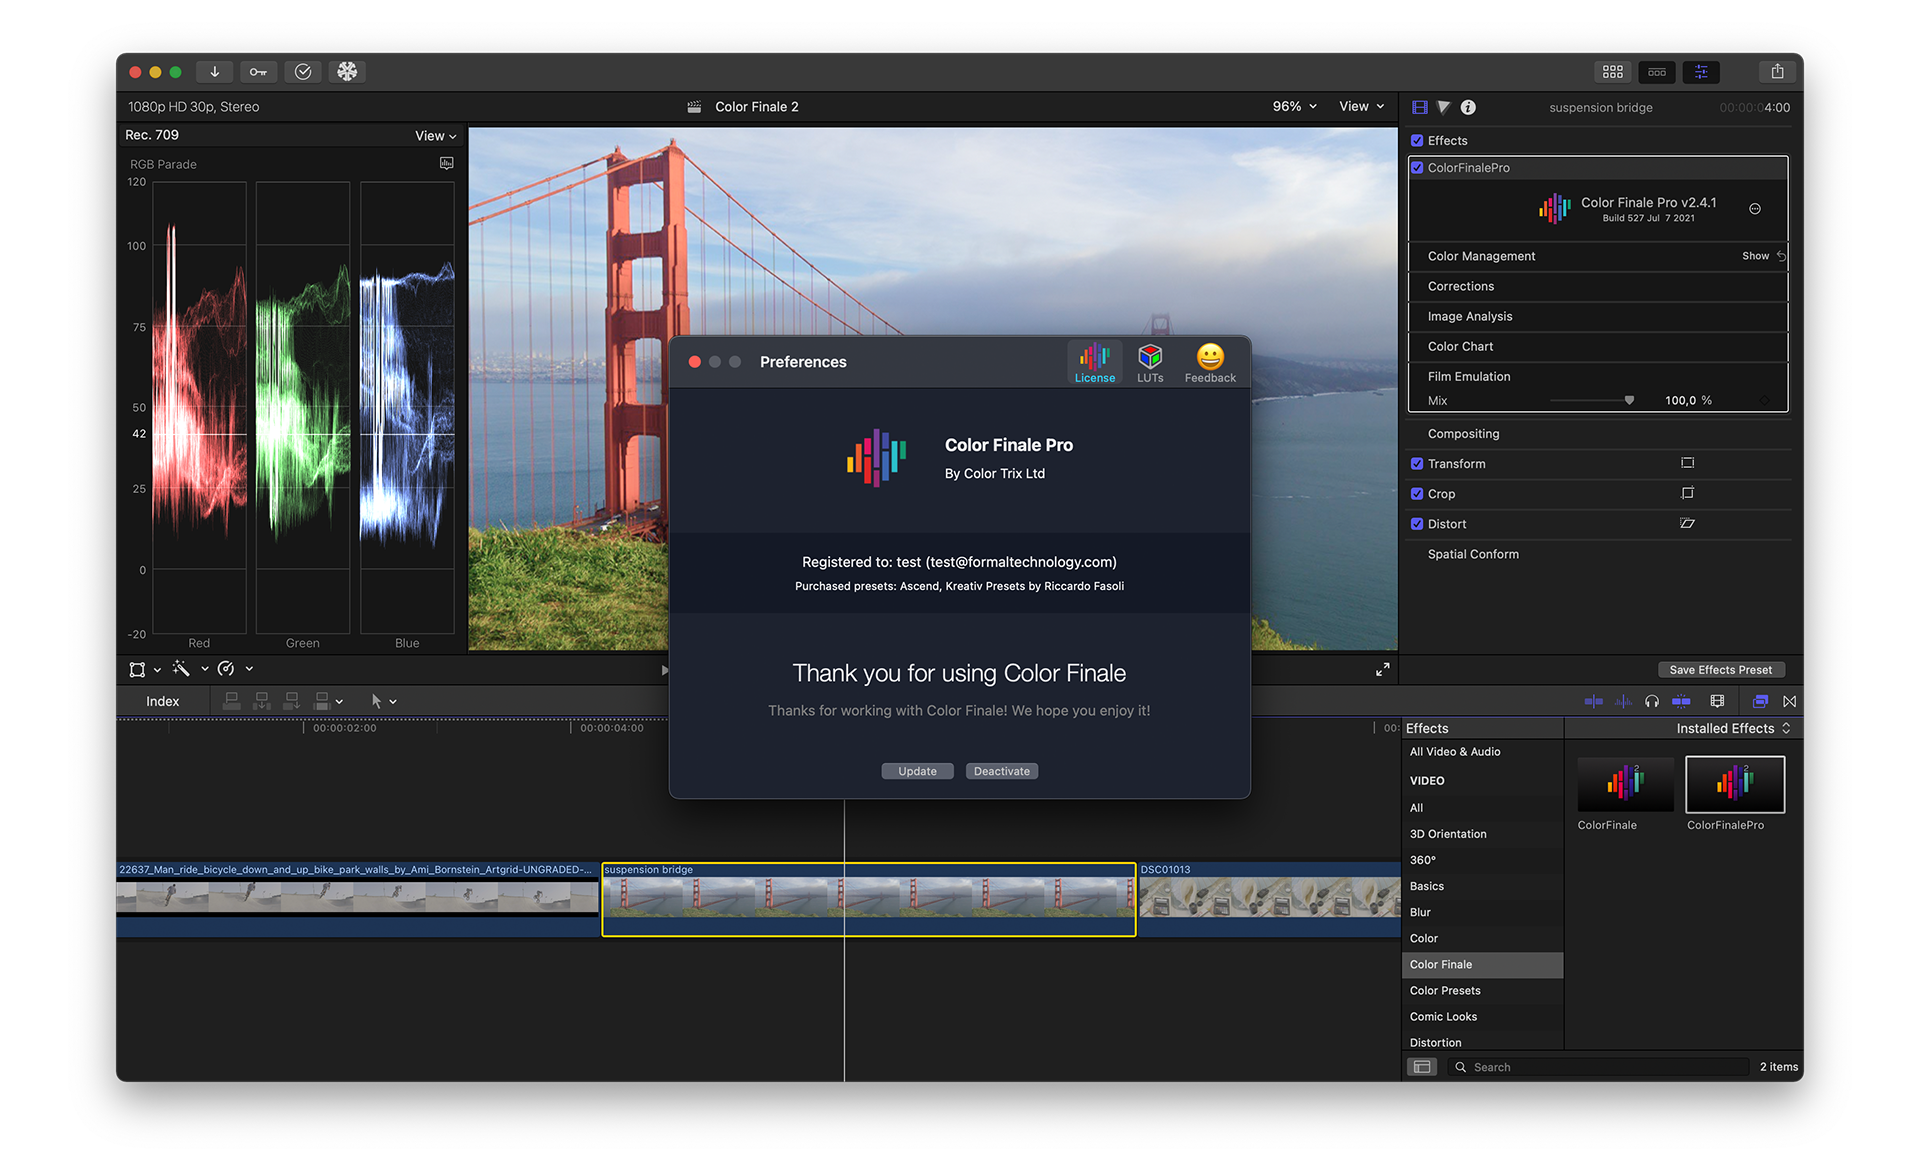
Select License to Activate or Deactivate Color Finale 2 on that computer. (The Color Finale 2 software license may be activated on two machines under your control at the same time.) License management is useful when you need to move to a different computer and continue working on a Final Cut project wit Color Finale 2 grades. If you have changed you Color Finale 2 version or license, click the Update button in the Preferences panel.
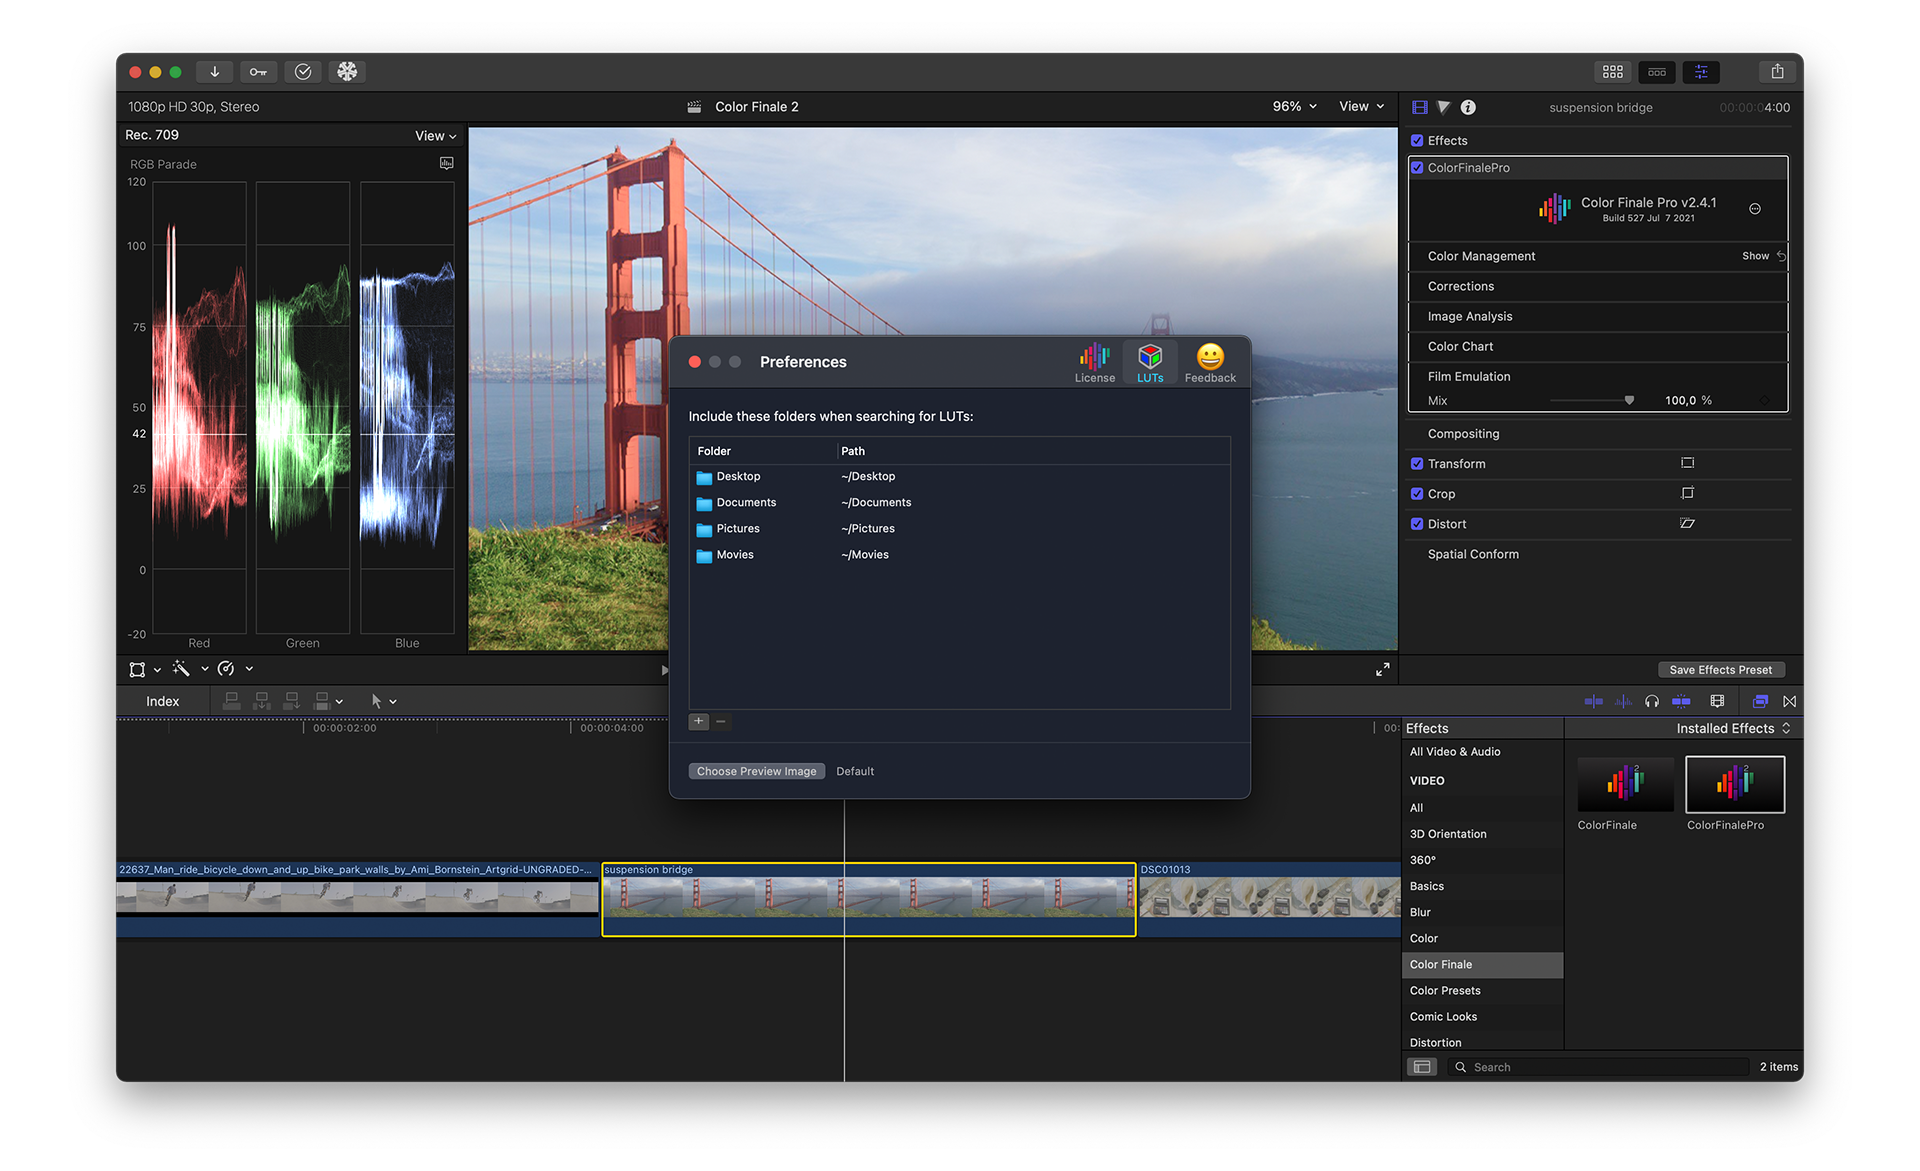
Select LUTs to add or remove LUT folders searched for by Color Finale 2. These are local folders available on your hard drives and not built into Color Finale 2. Click the plus symbol (+) to add local folders to this list. To remove a folder, highlight the folder name and click the minus symbol (-). Click the Choose Preview Image button to add a default image that will be used to display the look of the LUT. These LUTs will show up in the Layers panel when you select the Insert LUT or Preset option on the top bar. Then the LUT option will preview not only built-in LUTs, but also any LUTs within folders added in the LUTs section of Preferences. If Live Preview is not enabled, then these LUTs will be displayed using the selected preview image.
Settings
The Settings section contains options that control Color Finale 2 behavior:
- Disable Overwrite Layers & Masks Confirmation — when enabled, pasting copied layers and masks will proceed without showing a confirmation dialog. This speeds up the workflow when you frequently copy and paste grades between clips and don’t need the overwrite warning each time.
- Window Type — select between the inspector panel and the floating color correction window (available in Final Cut Pro 12).
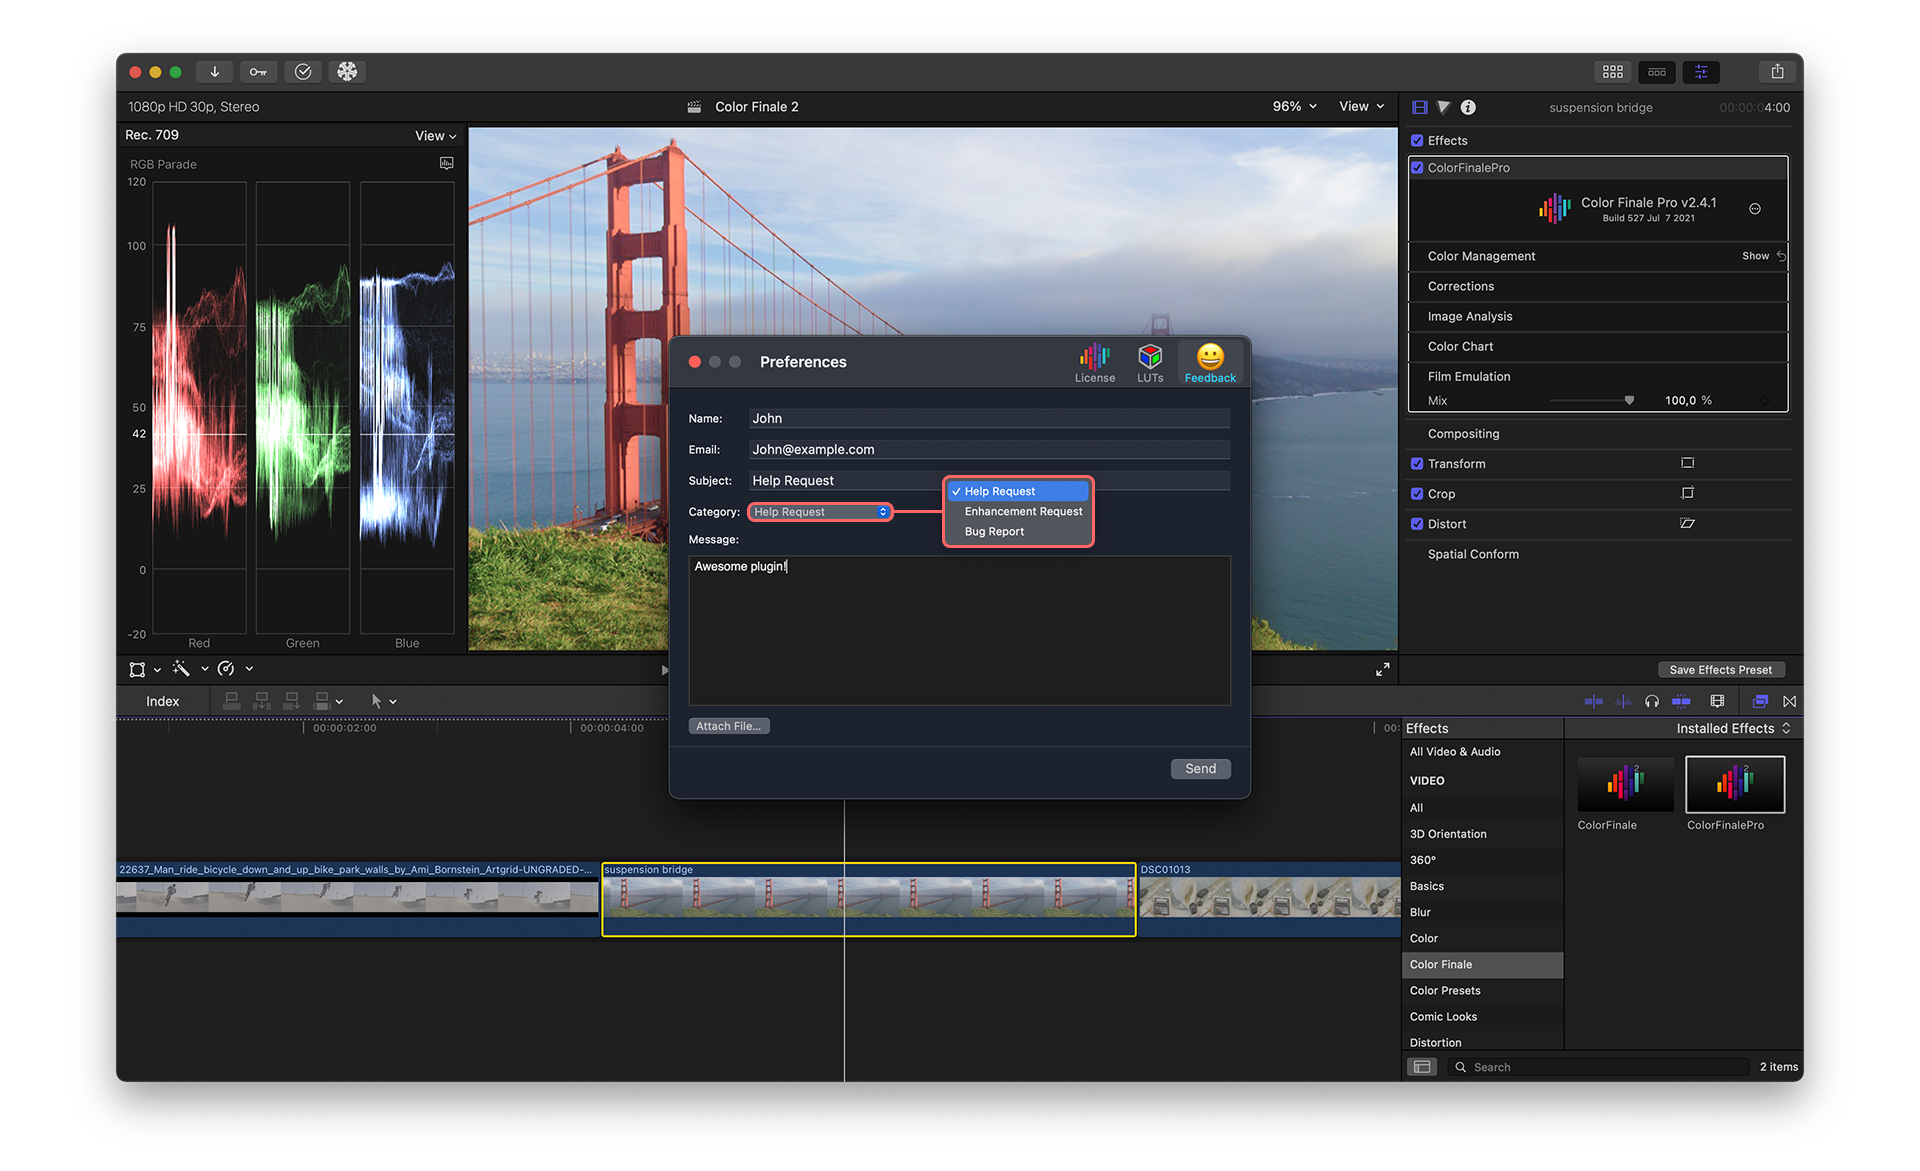
Feedback
Select Feedback to send bug reports, help requests, and suggestions for future feature enhancements to the Color Finale support team. This form uses a standard e-mail layout, including an area to enter your description. In addition, you can attach any files, such as system logs and screen capture, that would be helpful to the support team. If support needs to contact you for further information, you will receive an e-mail communication to the address that you have supplied.