Six Vectors
The Six Vectors tool is referred to in many systems as secondary color correction. This tool is often applied as the next step after a primary color correction has been made with the Color Wheels. The Six Vectors tool is used to further fine-tune specific colors within the image.
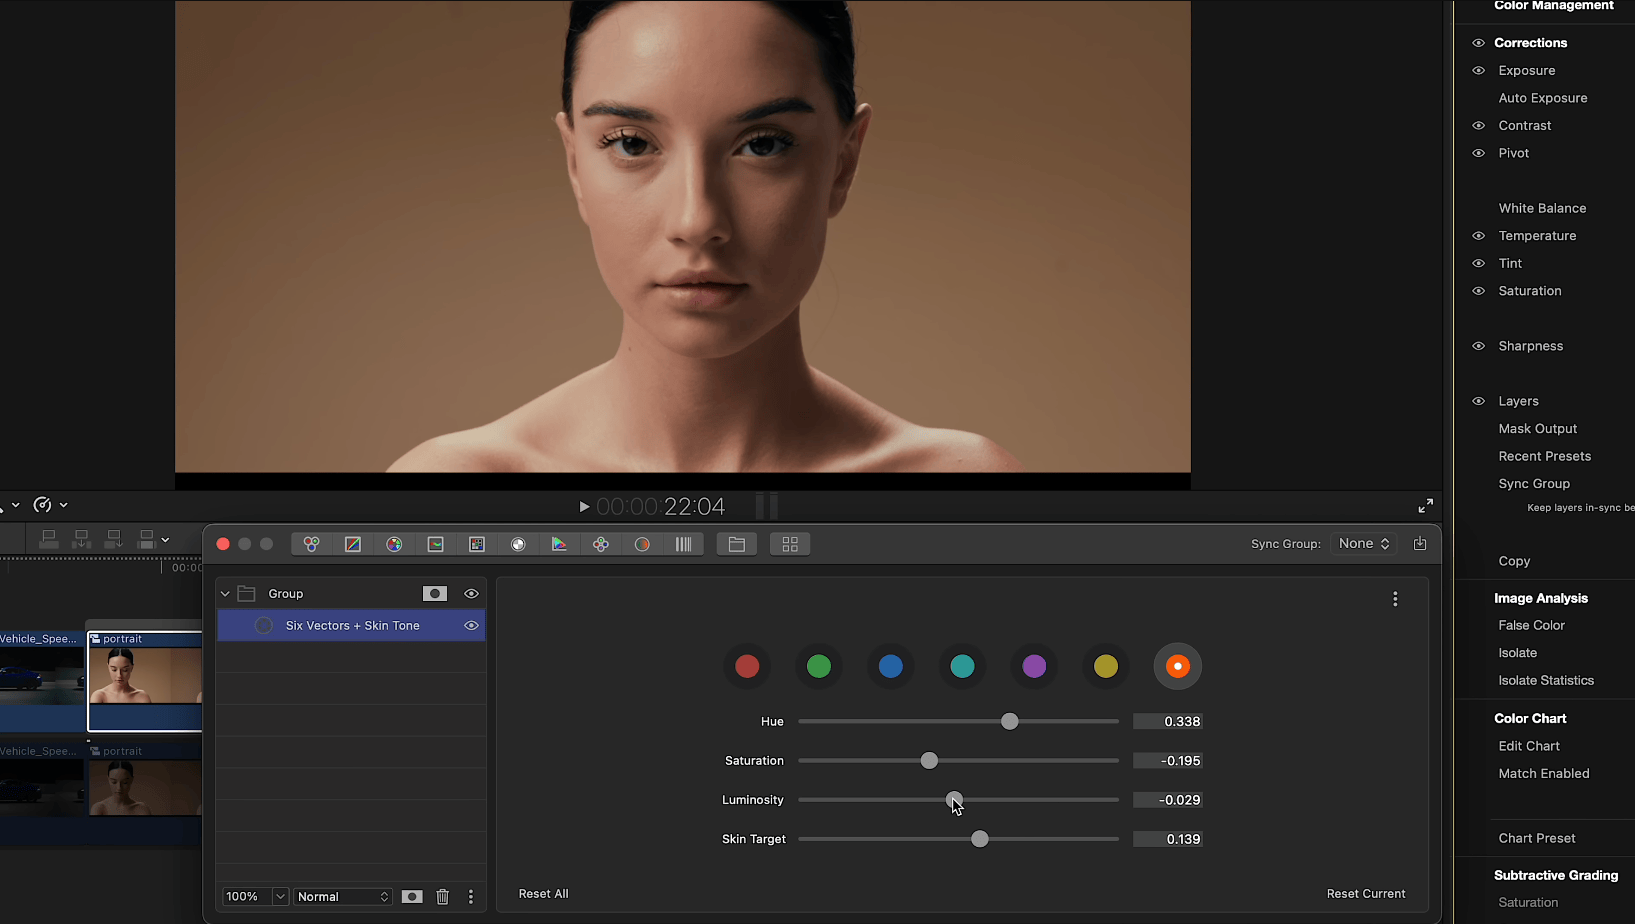
The color spectrum is divided into six regions of complementary colors — red, green, blue, cyan, magenta, and yellow — plus a dedicated Skin Tone vector. In a typical circular color display, such as on a vectorscope, the six color regions are like sections of a pie. Color Finale 2 enables you to selectively adjust the Hue, Saturation, and Luminosity (brightness) for each of these color sections or “pie slices.”
Import a standard color test pattern into Final Cut Pro, apply Color Finale 2 to the clip, and view the output on the vectorscope. You can readily see how these six colors from the test pattern align with the RGBCMY points on the vectorscope. Now select a color in the Six Vectors tool and adjust a slider. You will see that the changes only affect one color vector and not the rest of the pattern.
Skin Tone Vector
The seventh vector provides dedicated control over skin tones, offering precise and flexible control over this critical color range. The Skin Tone vector includes its own Hue, Saturation, and Luminosity sliders, plus a Target control that adjusts the hue center for skin tone detection. This allows you to fine-tune exactly which range of skin colors is affected without touching other warm tones in the image.
Extended Mode
A contextual menu toggles Extended Mode for saturation on and off. Color Finale 2 uses a greater range of saturation in the Six Vectors tool than legacy versions of the plug-in. The default setting is for Extended Mode to be on; however, it can be disabled for compatibility with legacy projects that may have used an earlier version of the plug-in.