Color Atlas
The Color Atlas effect remaps image tones using different luminance computation methods, applying them to a color gradient for a unique look. This allows you to reinterpret brightness and contrast in creative ways, from subtle enhancements to striking color transformations.
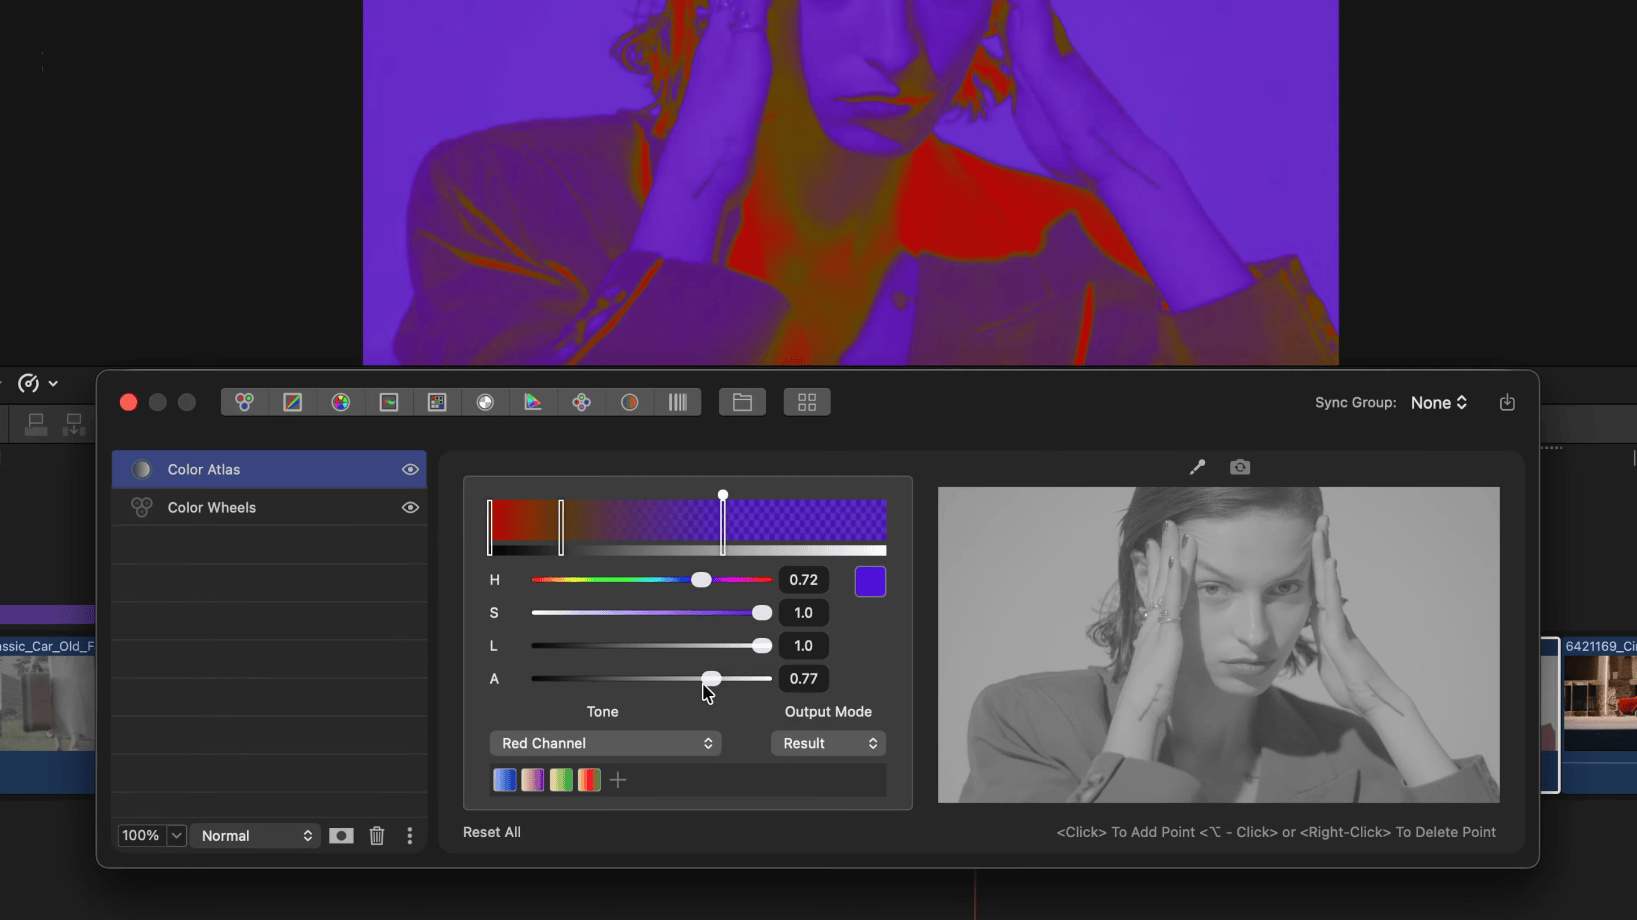
Gradient Editor
The gradient bar at the top of the Color Atlas panel displays your current color gradient. Interact with it to build your look:
- Click on the gradient bar to add a new color point
- Drag a point to move it along the tonal range
- ⌘-Click a point to open the system color picker
- Option-Click or Right-Click a point to remove it
- Up to 11 points can be placed on the gradient
A grayscale reference bar below the gradient shows the tonal range from black (left) to white (right).
Color Controls
When a gradient point is selected, four sliders appear to adjust it:
- H (Hue) — the color hue of the selected point
- S (Saturation) — the saturation level
- L (Luminosity) — the brightness/lightness
- A (Alpha) — the opacity of the gradient color at this point. Lower alpha values let more of the original image show through, allowing subtle tinting effects
Each slider has a reset button to return it to its default value.
Output Mode
The Output Mode dropdown selects what is displayed:
- Result — the final graded output, blending gradient colors over the original image using each point’s alpha channel
- Tonal Map — a grayscale preview showing how the selected luminance method interprets the image. Use this to understand how your tonal weight setting maps brightness values before applying colors
- Gradient — displays the gradient itself without mapping it to the image
Tonal Weight
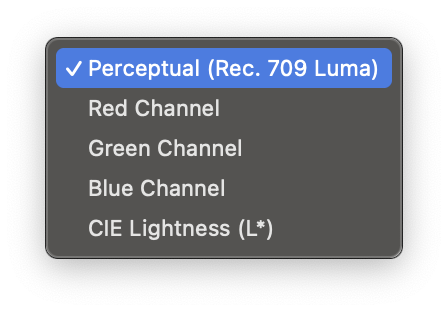
The Tonal Weight dropdown selects how each pixel’s brightness is computed before it is mapped to the gradient. Five options are available:
- Perceptual (Rec. 709 Luma) — the default. A weighted mix of the red, green, and blue channels that matches how the human eye perceives brightness. The natural choice for most footage.
- Red Channel — uses only the red channel as the brightness source. Useful for skin-tone-driven looks, since skin carries most of its detail in red.
- Green Channel — uses only the green channel. Green typically carries the cleanest luminance signal from a camera sensor, so this can give the smoothest mapping.
- Blue Channel — uses only the blue channel. Often the noisiest channel, but useful for mapping against skies or water.
- CIE Lightness (L*) — perceptually uniform lightness based on the CIE L*a*b* model. Produces more even gradient transitions than Perceptual on some footage.
Switching the Tonal Weight re-maps the entire gradient without changing your point colors — a quick way to audition a different feel for the same palette.
Picker
Click the Picker button to sample a color directly from the current frame. A 5x5 pixel grid appears under your cursor in the viewer. Click to add a gradient point with the sampled color. This is useful for building gradients from colors already present in your footage.
Presets
Color Atlas gradients can be saved as presets for reuse across clips and projects. The preset panel at the bottom shows thumbnail previews of saved gradients.
- Click the + button to save the current gradient as a new preset
- Use the contextual menu to rename, update, or delete presets
- Click a preset thumbnail to apply it
Presets are stored locally and persist across sessions.